Showing posts with label tips. Show all posts
I’ve recommended eBay before as a great way to test a new product. For a growing number of entrepreneurs, though, eBay is their sole storefront. The beauty of eBay is that it lets you get into e-commerce without having to go through the trouble and expense of setting up an ecommerce site of your own. These seven eBay selling tips will help you get started selling on eBay successfully and get on your way to becoming an eBay PowerSeller.

1. A picture IS worth 1000 words.

It’s old-fashioned, but people still like to see things before they buy them. For successful eBay selling, make sure any products you list on eBay are accompanied by professional quality photographs that meet eBay's photo requirements. (Note that all listings must have photos now.)
Photos used on Ebay must be a minimum length of 500 pixels for the longest side, have no borders, and have no text or artwork added (such as a seller's logo). You may use watermarks and in fact, eBay has its own watermark creation service - if you don't use theirs, be sure your watermarks conform with eBay's rules. As of this writing, you can still use stock photos, but only for brand-new items, not "as the primary photo for used items; exceptions are the Books, Movies, Music, and Video Game categories".
Just meeting the requirements isn't good enough if you want to actually sell the items you post and get top dollar for them; I strongly recommend that you read eBay's Top tips for taking great photos (pdf) and work at making your photos the best they can be.

2. Do your eBay research.

When selling on eBay, before you list a particular product, spend some time researching other similar products on eBay and following the bidding process. This will help you gauge the interest for your product and help you determine how much your product might be worth.

3. Learn all about shipping.

Shipping is under the control of the eBay seller, but some methods of shipping are better than others.
You want to find the best method of shipping for your product in terms of expense and reliability and then specify that shipping method in your eBay listing. (And don’t forget to include the shipping cost in your shipping information for potential buyers.)

4. Pay as much attention to the writing of your eBay listing as to your picture.

For selling on eBay, you need a powerful listing. And the trick to writing a strong eBay listing is to combine search engine friendly phrasing with concrete details about the product in a way that will entice people to bid on your product. Take the time to craft your eBay listing just as you would any ad.
Shipping from point to point in Canada? Here's What Online Business Owners Should Know About Provincial Sales Tax.

5. Offer a full slate of payment options, including credit cards.

The more payment options you, as a seller, offer prospective bidders, the more bidders your product will attract and the more successful your selling on eBay will be.

6. Focus on getting positive feedback first.

Feedback really matters when you're selling on eBay. If you have a consistent record of positive feedback, prospective buyers will both bid more often and be willing to pay higher prices.
So you may want to hold back on placing higher priced products until you have a successful track record as an eBay seller established.

7. Be business-like.

Act professionally, provide the kind of superior customer service that will build your reputation, and make sure that you’re following all the business rules that apply, such as registering your business and properly charging and remitting taxes. Selling on eBay is just like any other business; to become an eBay success, you need to follow the rules and provide the kind of customer satisfaction that will translate into increased eBay sales.


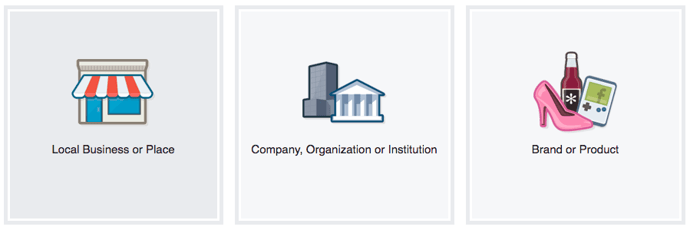
1. Create a business Page, not a personal profile.

First thing's first: You need to create a business Page -- not a personal profile -- to represent your brand. Pages look similar to personal profiles, but they include unique tools for businesses, brands, and organizations. Your fans can Like your Page to see updates from you in their News Feeds, which is something they can't do for personal profiles.
Not only will this maximize Facebook's business potential for you, but it's actually against Facebook's Terms of Service to use a personal account to represent something other than that person, like a business. If you've already created a profile for your business, you'll want to convert it into a business Page, which you can learn how to do easily here.
Setting up a page is simple. Just visit this page and follow the step-by-step setup instructions.
facebook-business-page-options.png 

2 Add a great cover photo.


Facebook's page design lets you feature a 851 x 315 pixel cover photo at the top of your business Page. You'll want to optimize that cover photo to capture the attention of new visitors, encourage them to explore and learn more, and provide an effective mobile experience -- all the while ensuring you're following Facebook's Page Guidelines.


3. Add a recognizable profile picture.

Pick a profile picture that will be easy for visitors to recognize -- like your company logo, or a headshot of yourself if you're a solopreneur or consultant. Being recognizable is important for getting found and Liked, especially in Facebook Search. Your profile image is pictured at the top of your Facebook Page and is also the thumbnail image that gets displayed next to all your Facebook Page updates, so choose wisely.


4. Add milestones.

The "Milestones" feature lets you highlight some of your business' biggest accomplishments, like award wins, product releases, major events, or other accolades. Recent milestones will be posted to your Timeline, and users will be able to find them later under your "About" tab.
To add milestones, click on the "Timeline" section of your Page, and click the "Offer, Event +" option in the page update composer near the top of your page.
add-milestone.png

5. Choose a call-to-action button.

The option to place a simple call-to-action button at the top of your Facebook Page. You can learn how to add a CTA button to your business' Facebook Page here.
You can choose from seven pre-made button options ("Sign Up," "Shop Now," "Contact Us," "Book Now," "Use App," Watch Video," and "Play Game") and link it to any website that aligns with your business' goals. It could link to your homepage, a landing page, a contact sheet, a video, or somewhere else.

6.Create custom page tabs.

By default, your page tabs are set as Timeline, About, Photos, Likes and More. But Facebook lets you create and leverage custom tabs -- which are basically like landing pages within your Facebook Page, or calls-to-action where you can feature anything from case studies to marketing offers to other promotions you're running.


7.Post at the best times for your audience.

Another common question: When’s the best time to post to Facebook? Unfortunately, there's no perfect answer -- different businesses may find different days and times work best for them. Timing often depends on what your target audience uses Facebook for, the region(s) you're targeting, the content of your post (e.g. funny or serious), and your goals (e.g. clicks versus shares), and so on.
That being said, there is data out there on optimal times to post on Facebook:
  • The best time to post on Facebook is 3:00 p.m. on Wednesday. Other optimal times include 12:00–1:00 p.m. on Saturdays and Sundays and 1:00–4:00 p.m. on Thursdays and Fridays.
  • Engagement rates are 18% higher on Thursdays and Fridays, and weekdays from 1:00–4:00 p.m. tend to see the highest clickthrough rates. On Fridays, Facebook use spikes by 10%. Since people tend to be happier on Fridays, Neil Patel suggests posting funny or upbeat content to match your audience's mood.
  • The worst times to post on Facebook are weekends before 8:00 a.m. and after 8:00 p.m., according to SurePayroll's research.
Think of this data as a general guideline, and use it to help you find the optimal posting times for your business.

8.Make sure your blog posts' meta descriptions are complete.


Have you noticed that when you post a link to Facebook, it pulls in a brief description as well as an image?
The description gets pulled from the page's meta description, which refers to the HTML attribute that explains the contents of a given web page. It's the short description you see on a search engine results page to "preview" what the page is about, and it's also the copy Facebook will automatically pull in the populate the description of a post.

Use Facebook Insights.

Facebook Insights is Facebook's internal analytics tool right that helps you measure and analyze your Facebook presence. The tool provides Facebook page administrators with analytics data about Page visits and engagement, which can help you understand which content is and isn't engaging to your fans.
Access your page's Insights here, or by clicking into the 'Admin Panel' on your Page. We've also published an informative blog post and video that walk you through how to analyze Facebook Insights to improve your content strategy.

9. Schedule posts in advance.

Scrambling for Facebook content is not a new phenomenon. We have meetings. We run late. Things come up. That's why you'll want to use a third-party Facebook application like HubSpot's social media publishing tool to schedule your Facebook posts (and other social media posts) in advance.
First, download our free social media content calendar template to help plan your posts in advance. You can fill it in at the same day and time every single week to prep for the following week's social media content. Then, use that third-party Facebook application to actually schedule out your posts.
However, just as we advised against too much Facebook automation with blog auto-posting, the same holds true for scheduling. Don't get caught in the trap of turning your page into a robot, and make sure you're actively engaging with your fans, too.

10. Add Facebook social media buttons to your blog and website.

Adding Facebook social media buttons will help encourage visitors who are on your website to also connect and interact with you on Facebook, as well as spread your content and expand its reach.
The Facebook Follow Button lets you expand your Facebook reach by making it easy for your site visitors to Like your business' Facebook Page with just one click. It displays your page's number of Likes, as well as faces of people who already like your page, using social proof to amplify its effectiveness.
To customize your button, visit this page and follow the instructions.
The Facebook Like Box lets you promote your business' Facebook Page on your website and blog, highlight other users who have already Liked your page, display your follower count, and feature recent posts on your page. With just one click, people can Like your business Page -- without leaving your site.
To generate a Facebook Like Box for your website, visit this page and follow the instructions.
The Facebook Like Button lets people easily Like your content. When a user Likes a piece of content, it may show up in your friends' News Feeds because the algorithm takes it as a signal your friends will find it relevant.
(Note: This button doesn't allow them to add personalized messages to links before sharing them. To allow users to add a personalized message, use the Facebook Share Button, explained below.)
To customize your Facebook Like Button, visit this page and follow the instructions.
Facebook Share Buttons act similarly to the Like Button by sharing your content on their Timeline and in friends' News Feeds, except they also let people add a comment or message to the link when sharing it.
To generate a Facebook Share Button, visit this page and follow the instructions.

11. Subscribe to Facebook's Official Blog for future announcements from Facebook.

Give yourself a competitive edge by staying on top of the latest announcements from Facebook such as new features and tools by subscribing to the official Facebook Blog.

Tips For Advertising on Facebook

23. Choose the right advertising tool. (Probably the Ads Manager.)

Facebook offers users two different tools for creating a paid ad: the Ads Manager and the Power Editor. The Power Editor is usually best for larger advertisers looking for more precise control over many campaigns. If that doesn't sound like you, the Ads Manager works great for most companies. Figure out which is best for your business based on your company size and the number of ads you plan to run at once.

12. Use Audience Insights to learn about your audience.

The best Facebook ads are high-quality, relevant ads that fit seamlessly into the user's environment on Facebook. Learn more about your customers and prospects using Audience Insights, which you can find inside the Facebook Ad Manager in the left-hand navigation.
The tool will help you target your ads more effectively and learn about your audience -- even if you are not advertising to them. How? The data can help you build stronger buyer personas, create more compelling content, and uncover some gems for your competitive research. (Read this step-by-step guide to Audience Insights for more detailed instructions and tips.)

13. Test multiple versions of a single ad.

Running a single campaign won't give you much to work with in terms of finding your audience, optimizing your ads, and determining if Facebook advertising works for your business. You need to be able and willing to run multiple campaigns to test and experiment with different parts of a single campaign.
Test your targeting first, using a simple advertisement and basic image, suggest the Brian Carter for Convince & Convert. "There are usually at least five to ten ways you could target your prospects," he says. "Find the one or two audiences that convert best at the lowest cost per lead."
In order to reach and test on a wider audience, you're going to have to invest a reasonable amount of money on your campaign. The folks at BuzzSumo suggest that number be in the thousands. The reason for this? Facebook ads reward you for testing more ads and targets. Whereas cost-per-click doesn't change much when you're advertising on Google or LinkedIn, Facebook ads cost a lot less if you're diligently testing them.